People I follow..
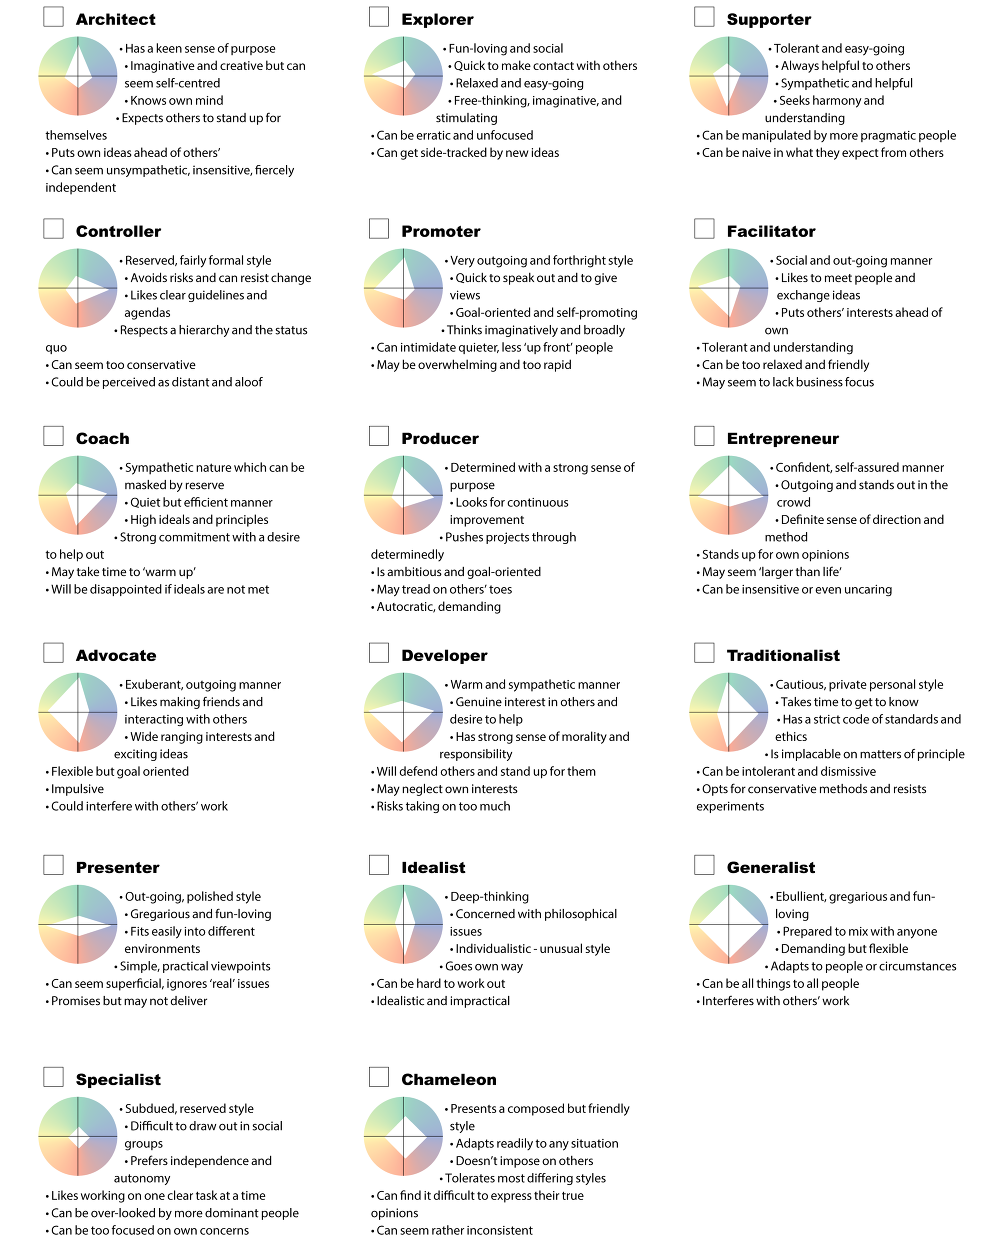
As most of you will be aware, I find management and leadership courses to be a bit futile. Yes, you do pick up good ideas and practices, it is a great way to network with your peers, but has anyone come out a reformed leader / manager… not that I’ve seen. Worse than that, when under stress people revert back to the manager they are. Having said that, in my time in leadership roles I have come across a couple of real gems of people, who I admire and respect, they talk sense (to me). I will update this page if any new ones pop up!

I first came across Simon Sinek a few years ago on a random management course I had been sent on. For some reason he stuck, the way he talks, the way that some of his talk is science (some of it is pseudo science and junk, so be careful). The way he talks and the passion behind it. He is one of my all time favourite TED talkers.
My personal favourite video is this one. His books are a good read and he is constantly tweaking and refining his work.
Dave Coplin is an absolute tech legend. Having worked at Microsoft for approximately a billion years, he was their Chief Envisioning Officer, he totally embraces the fact that we need to change the way we work. We need to accept technical change and more than that we need to embrace it.
His book Business Reimagined is short, but totally worth a read. The video Re-imagining work shifts in the digital revolution is really worth a watch.
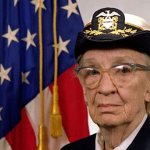
Many of you know my absolute IT hero is Grace Hopper.
She was a truly talented computer scientist, in a time before computer science. She coined the term “bug” when she found a moth in one of her computers that wasn’t working. Her lectures were easy to follow, even on the most complex of subjects including on how far data travels in a second which she used chucks of physical cable to illustrate.
She was a decorated Navy veteran and in 1986 she was the oldest active-duty commissioned officer in the US Navy.
A true pioneer. She also gave the world one of my favourite quotes of all time
“It’s to ask forgiveness than it is to get permission.”
My IT Titans
OK, this one is a cheat, but I wanted to reflect the people who I respect in my industry… All of them for different reasons, but mostly because they are amazing technologists, leaders, business owners and actual people.
- Bill Gates – Microsoft
- Michael Dell – Dell
- Steve Wozniak – Apple
- The other Steve – Apple
- Bill Hewlett – HP
- David Packard – HP